How do I add a new client?
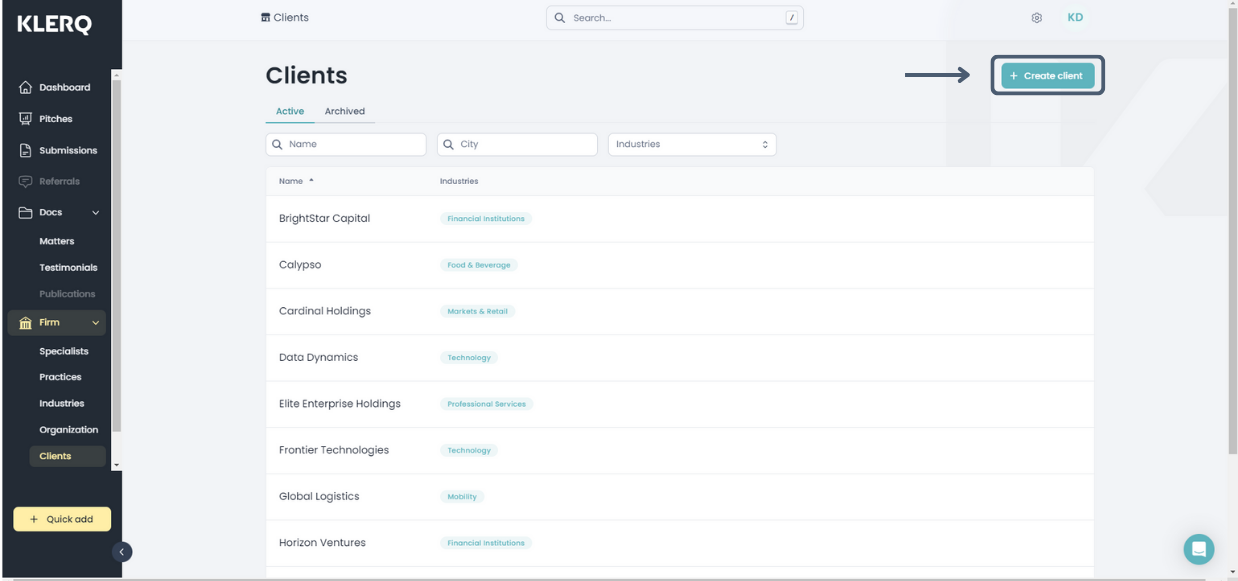
In the left menu bar, click on 'Clients' under the heading 'Firm'
.png?width=688&height=323&name=Screenshots%20articles%20%20(3).png)
To add a new client, click 'Create client' at the top right corner of the page.

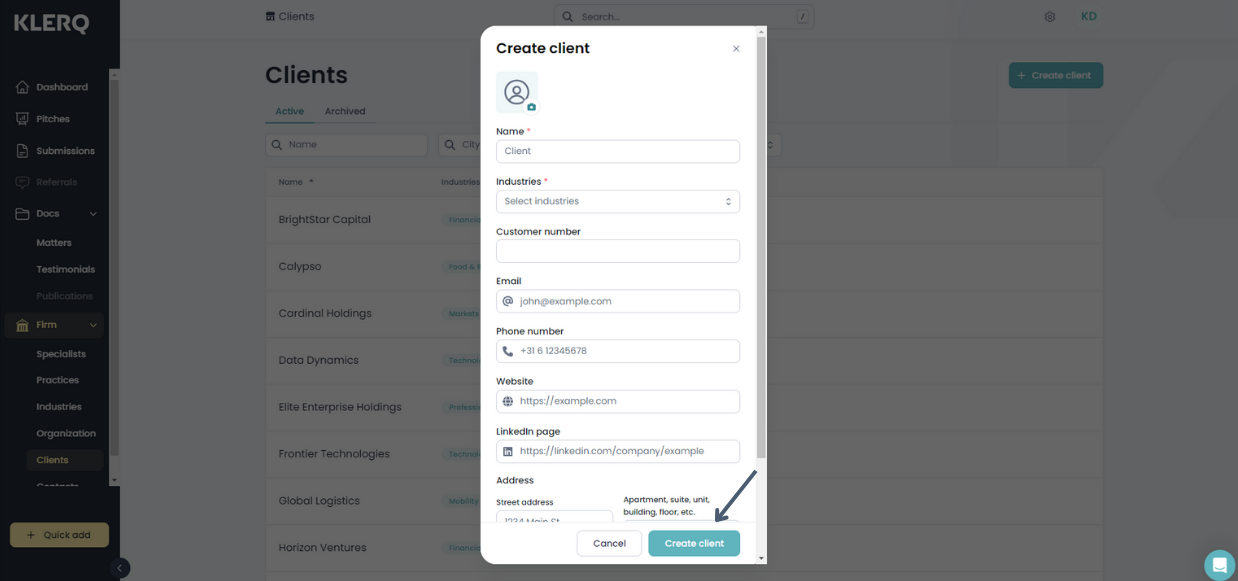
You will then see information fields that you can fill in
-
Profile picture
-
Name*
-
Industries*
-
Customer number
-
Email
-
Phone number
-
Website
-
LinkedIn page
-
Address
-
Street address
-
Apartment, suite, unit, building, floor, etc.
-
Postal code
-
City
-
Region
-
Country
-
Once you have inserted all the applicable information, click 'Create client' at the bottom right corner of the pop-up to create the new client.

