How do I create a new pitch?
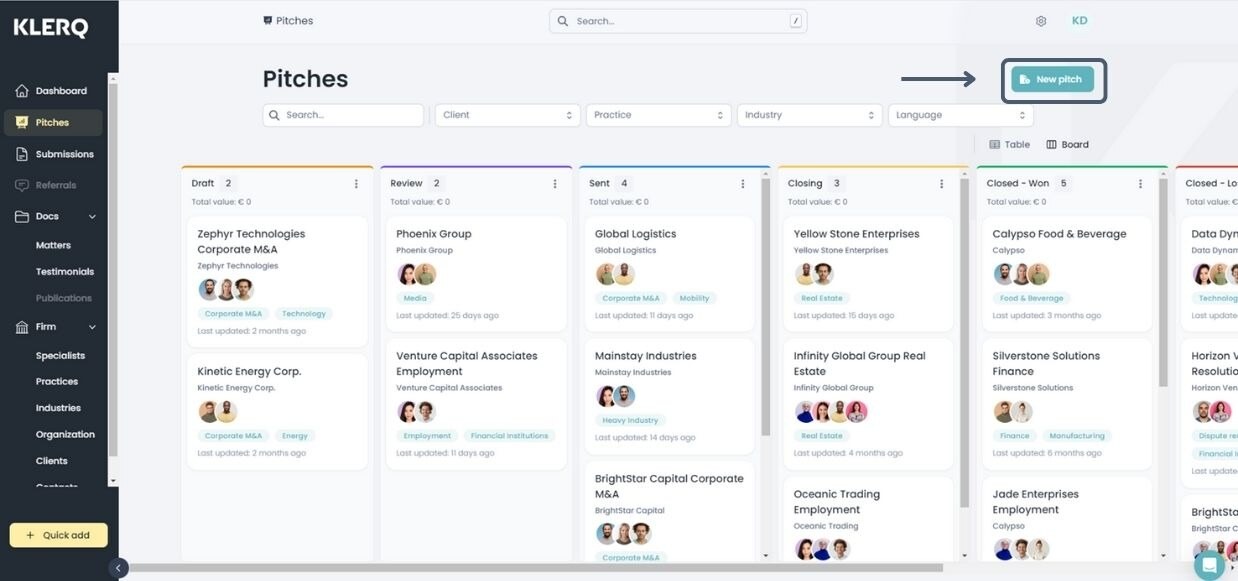
In the left menu bar, click on the heading 'Pitches'
.png?width=688&height=323&name=Screenshots%20articles%20%20(2).png)
To create a new pitch, click on the 'New pitch' button at the page's top right corner.

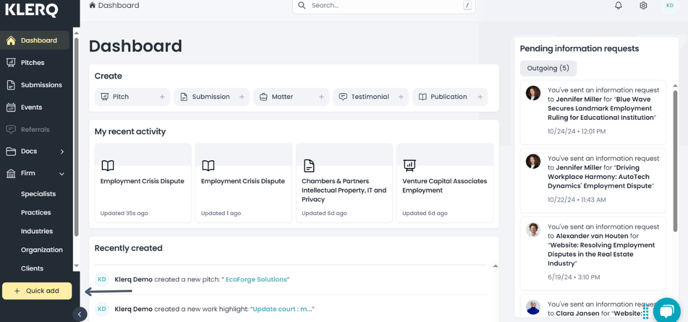
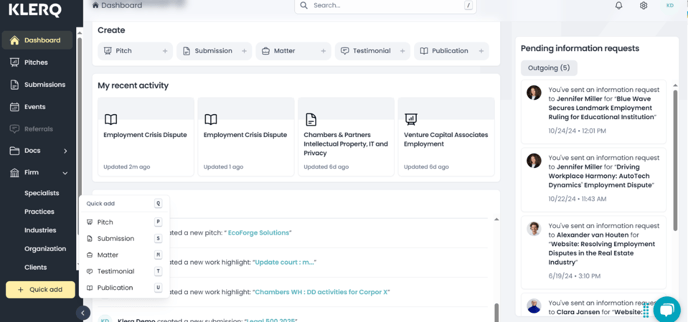
Another way to create a new pitch is by clicking on 'Quick add' on the down left corner of the page.

Then click on 'Pitch' A shortcut for this is to press the 'q' and 'p' on your keyboard.

You will be guided through a step-by-step pitch creation process as follows:
-
General information. This will include the following:
-
Client*. You can select an existing client or click 'Create client' to create a new one
-
Industry
-
Practice
-
Title*
-
Documents
-
Language*
-
Estimated value
Click 'Next' at the bottom right to proceed to the next step.
-
-
Specialists. Add which specialists are related to this pitch.
-
Lead specialists*. Select the lead specialist by clicking 'Add lead specialists' to the right of the lead specialist heading.
-
Support specialists. Select the lead specialist by clicking 'Add supporting specialists' to the right of the supporting specialist heading.
Click 'Next' at the bottom right to proceed to the next step.
-
-
Preface. Write the pitch preface. Click 'Next' at the bottom right to proceed to the next step.
-
Scope of work. Describe the scope of the pitch. Click 'Next' at the bottom right to proceed to the next step.
-
Firm. Introduce the firm to the client. Click 'Next' at the bottom right to proceed to the next step.
-
Practice description. The practice description is automatically derived from the selected practice in general information. You can edit this by clicking 'Edit' at the top right. You can also choose the language in which this is written. Click 'Next' at the bottom right to proceed to the next step.
-
Team. Write a short introduction about the team selection. Click 'Next' at the bottom right to proceed to the next step.
-
Pricing. Select the pricing you want to include in the pitch. Click 'Next' at the bottom right to proceed to the next step.
-
Content. Select relevant content you want to include in the pitch to convince the client.
-
Insert work highlights by clicking 'Add work highlights' and selecting the relevant ones from the popup. Then click 'Add work highlights' at the bottom right of the popup to insert it in the pitch.
-
Insert testimonials by clicking 'Add testimonials' and selecting the relevant testimonials from the popup. Then click 'Add testimonials' at the bottom right of the popup to insert it in the pitch.
-
Insert cleints by clicking 'Add client' and selecting the relevant clients from the popup.. Then click 'Add clients' at the bottom right of the popup to insert it in the pitch.
-
There is a standard order of the steps but you can adjust this to your own preference. You can adjust the order of the categories on the left by grabbing (clicking and holding) the six dots on the left of the category name. You can also use the arrows to the right of the category name.
.png)
Once you have inserted the relevant pitch information, click 'Finish' at the bottom right of the page to create the pitch.
.jpg)
